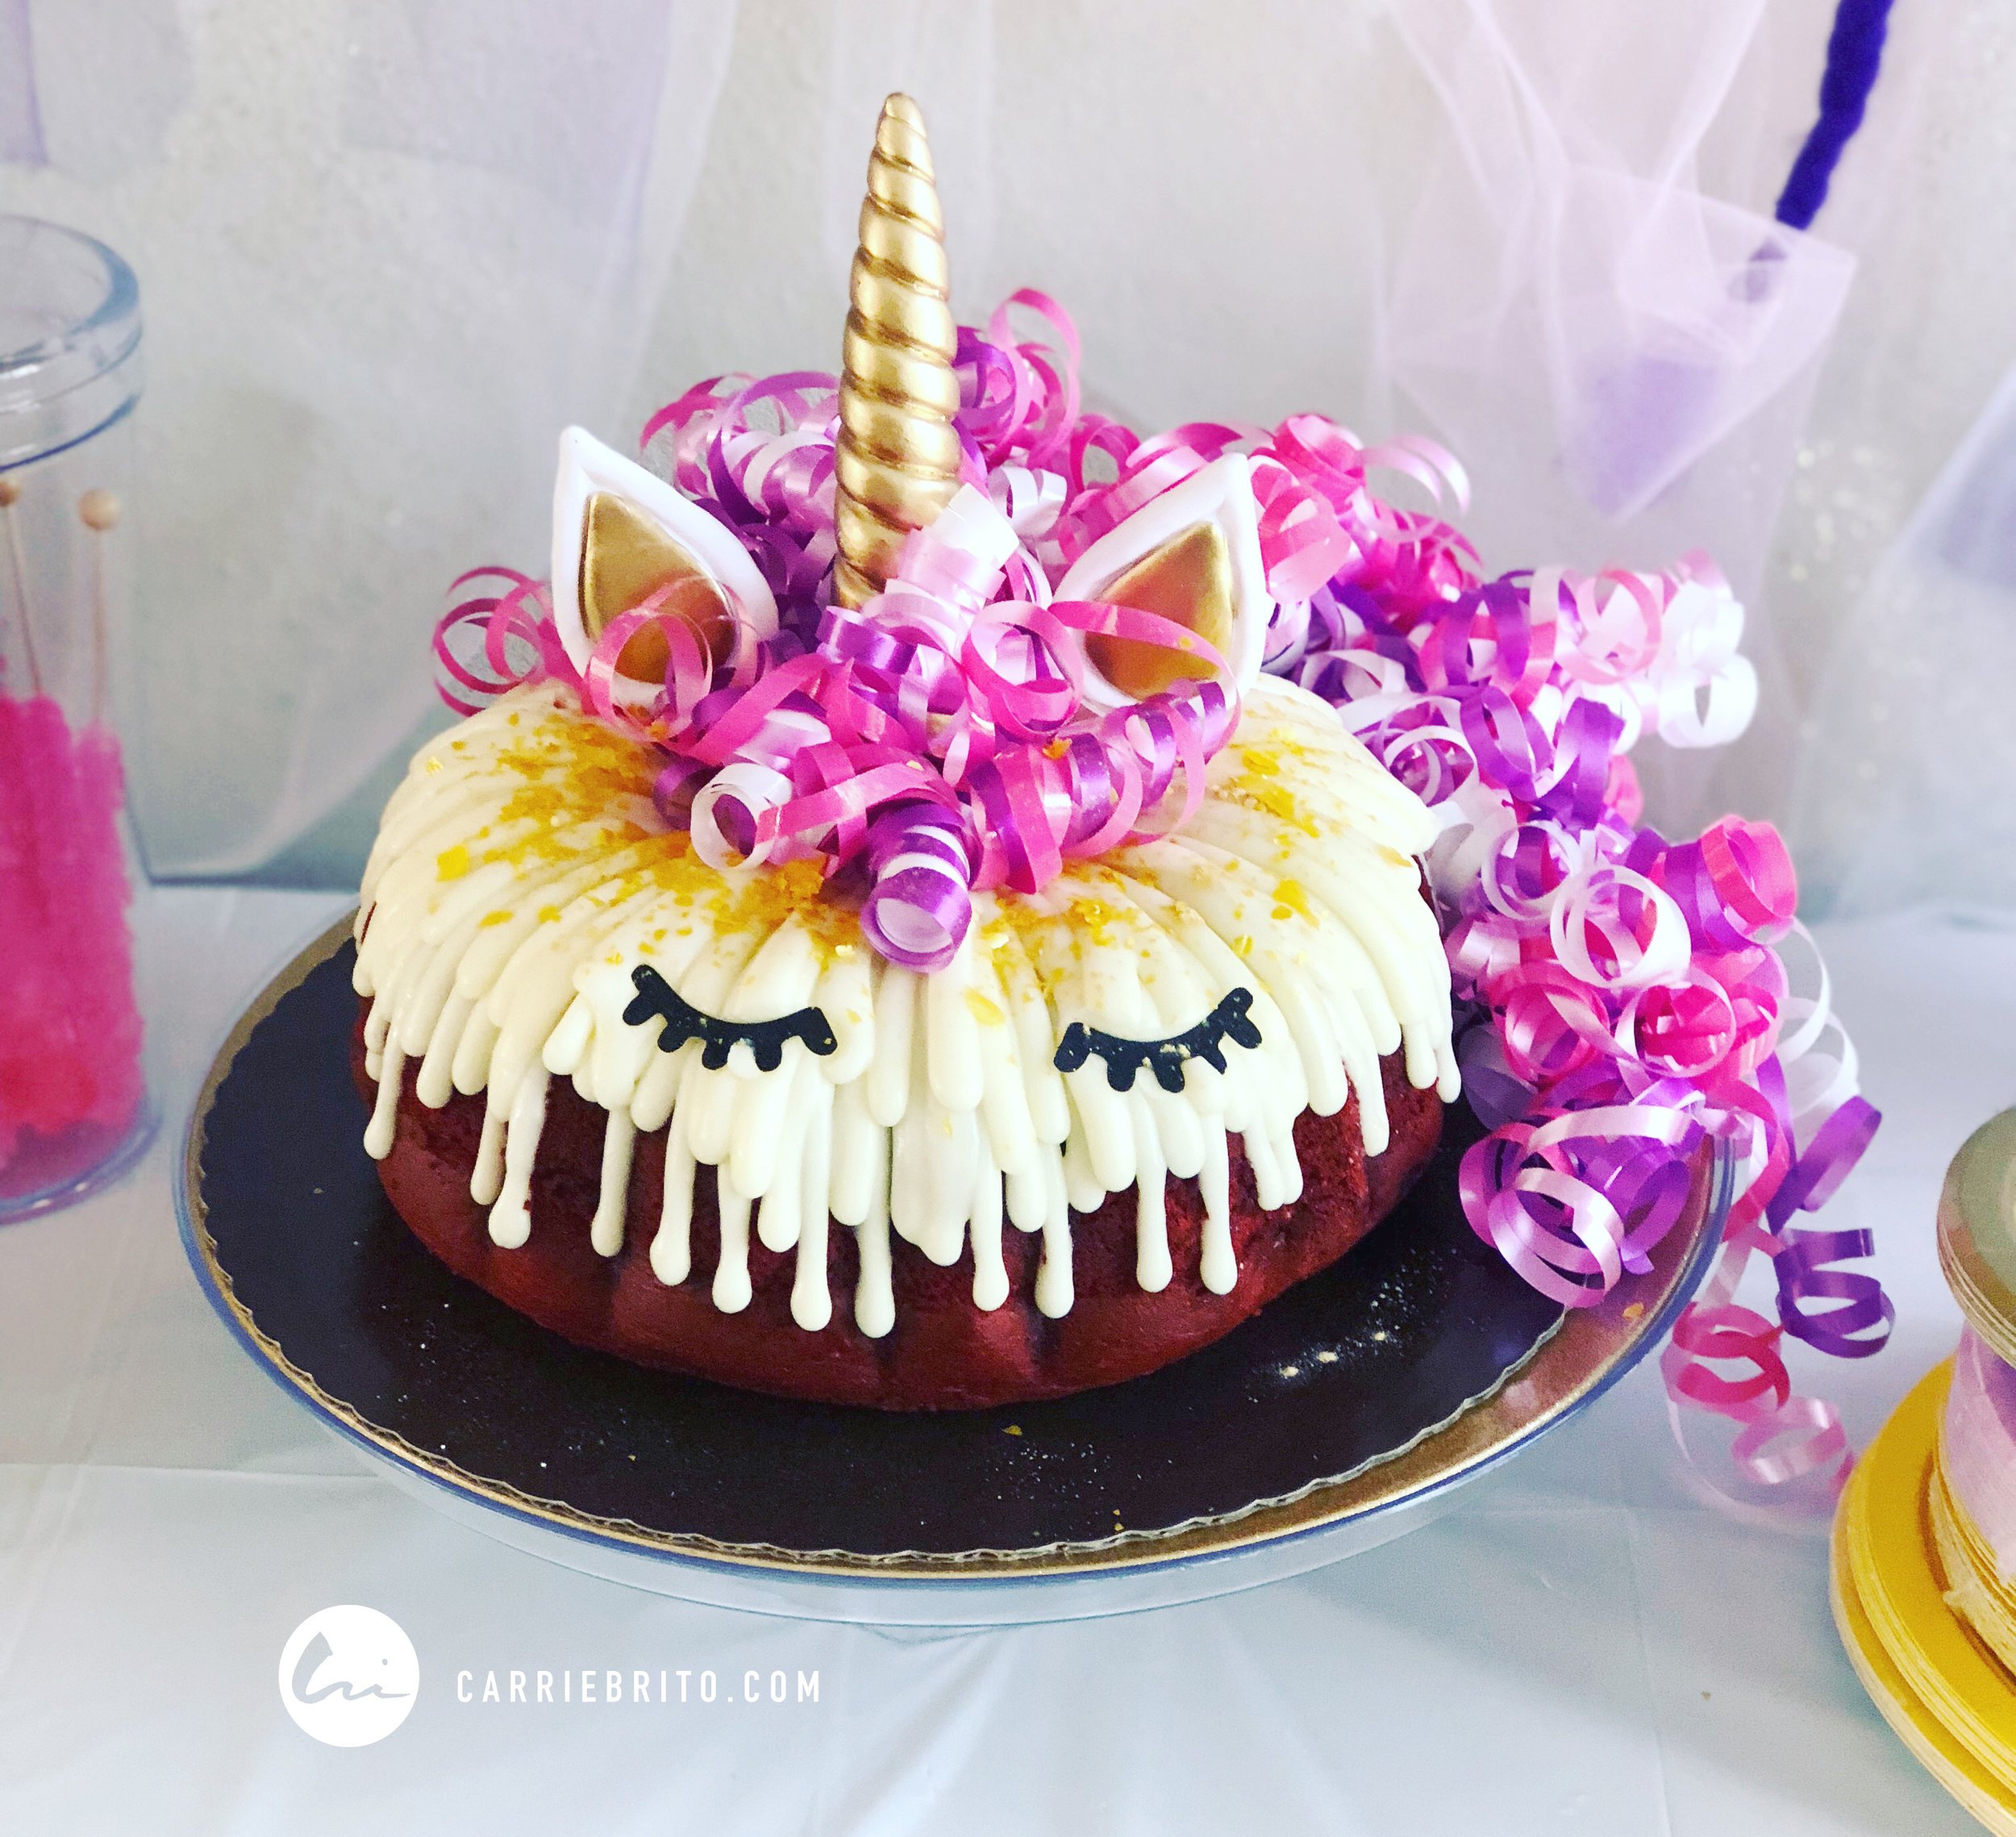
DIY Unicorn Cake in Under 10 Minutes
For my daughter Gabriella's 4th Birthday she wanted the all popular unicorn theme so I jumped at the chance to get one of those really cute unicorn cakes you see everywhere. I started pricing them out at local bakeries and it was averaging $100 for an 8" round cake with the unicorn horns, ears, eyes, and frosting mane and I had no idea if the cake would taste good. So, I decided to design my own using a cake I know my friends and family LOVE. Below is exactly how I did it. Once you have all the elements. Assembly time is less than 10 minutes.
Get the different elements you will need for the cake ahead of time.
I ordered the horn, ears, and eyes from Amazon here. I Purchased the larger 7.9 x 1.37. It was very good quality and is reusable.
Multicolored curly bows. I purchased mine at Hobby Lobby. I used about 6 (they came in a pack of 3). Or if you have the time you could always make your own. Amazon has some here.
Edible gold flakes. I purchased mine here. If you don't have a Hobby Lobby nearby you can order here.
Cake stand. You can find a plastic one here.
Order your Nothing Bundt Cake. The cake is my favorite red velvet flavor from Nothing Bundt Cakes. I used the 10" Red Velvet Bundt Cake with DRIZZLE FROSTING and no decoration. The cake lasts 3-5 days in the refrigerator so I order mine online and pick it up a few days before (they deliver too). They always have samples to try in store so I like to pick mine up ;-) I cover it lightly in plastic wrap and keep it in the refrigerator.
During your party, take the cake out of the refrigerator about 1 hour before serving and remove the plastic wrap. Place the horn first, not in the center but towards the back of the cake, I placed mine just at the edge of the inner ring of the cake. Next, place the ears on both sides of the horn at a slight angle and not too far from the horn. Now, add the curly bows for the mane. I placed one in front of the horn than the rest down the back and wrapped around the side of the cake. Now lightly sprinkle on the edible gold flakes. Lastly, place the eyes into the frosting. The eyes stay better after the frosting has sat at room temp.
This cake was a huge hit, SUPER easy to do, and is tastes AMAZING. Post below and let me know if you try it!
Enjoy!


